homegrown tomatoes
Hybrid Tomatoes, Part 2
I talked about hybrid tomatoes in part 1 of this post. Now that we’ve discussed the cherry varieties, let’s talk about how the slicer-size hybrids are doing in the garden.
Hybrid Tomatoes in the Garden
Just as a review, I have the following slicer-sized hybrid tomato plants in the garden:
- Celebrity Bush (determinate slicer)
- Fabulous (determinate slicer)
- Goliath Bush (determinate slicer)
- Park’s Whopper (indeterminate slicer)
All these plants have there own merits, but so far, Fabulous has been, well, fabulous! It’s by far the most vigorous, and has a nice, healthy growth, and regular leaves. I have it growing in a 5-gallon container, and it behaves as if it were in the ground – very lush and full of blossoms.
There aren’t any ripe tomatoes yet on Fabulous (darn!), but I’m looking forward to them. If they taste even half as good as the plant currently looks, it’s earned a continued spot in my garden.
And how have the others fared?
Bush Goliath has been the most prolific to date, and the tomatoes from one of the plants has been fairly good; the other one’s taste has been forgettable. Both plants currently have ripening tomatoes, so we’ll see how this batch does. Bush Goliath is a fairly small plant in my garden, at just 16 inches tall, with rugose leaves.
Celebrity Bush has had a hard time with the cold weather this year. While it’s normally quite productive, this season’s chillier-than-usual winter has taken its toll. It has come back some, now that the warm weather is here to stay. I’ll keep an eye on it. This plant is about 12 inches tall at the moment, and has rugose leaves.
Park’s Whopper currently has the best tasting fruit of the group. The winter has been hard on it as well, but it’s coming back and producing some nice tomatoes. Had a great one on a sandwich yesterday! The plant is now at 12 inches tall (the February frost nearly did the plant in totally), and has regular leaves.
Tomato Growing Tips
These tomato growing tips are for inexpensive ways to stretch your gardening budget. After all, part of the reason for gardening is so you pay less for vine-ripe tomatoes! Not to mention the deliciousness of homegrown tomatoes. 😀
There’s a book out on the $64 tomato, where a gardener says that after he tallied up all his costs associated with his tomato plants, and divided it among the tomatoes harvested, it came to something like $64 a tomato.
No, it doesn’t cost that much! I haven’t read the book, and I’m sure part is tongue-in-cheek. But it is true that if you don’t watch it, you, too can be spending a whole lot more than you intended.
Tip #1: Household Items
Some of the household items I like using include used (washed) pantyhose; cut them in wide strips and you can use them for tying up the tomatoes to their stakes.
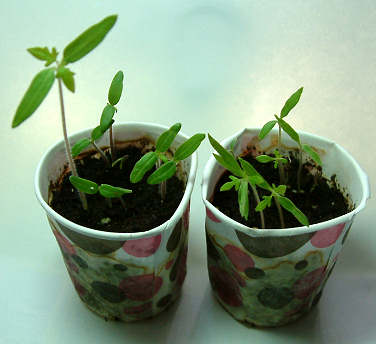
Small 3-ounce Dixie cups are fantastic for germinating tomato seeds and really inexpensive (especially if you get the store brands).
Gallon containers like plastic milk jugs and tea jugs are great for mixing up fish and seaweed emulsion fertilizer drenches. Just remember to label the containers with their new ingredients! Two liter bottles are fine as well.
All kinds of household plastic and waxed paper containers can be used for temporary potting, before setting out in the garden. Just make sure to punch holes for drainage.
Tips For Fertilizers and Soil Amendments
Most fertilizers have a high nitrogen component, which is not what you want for tomato fruits! And most fertilizer instructions want you to apply them far too often. If you have enriched your garden soil with compost or composted manure, you will need far less fertilizer. I generally apply my fertilizer at half the strength suggested on the label instructions with good results.
If you have the room, set up a compost pile. depending on your climate it can take anywhere from a month to a year for finished compost, but your tomatoes will thank you. And since compost is made from food scraps you’d normally throw away, it’s a great way to recycle.
If you live in an area with cows or horses, see if you can arrange to cart away some of the manure; normally you can get your manure free this way — put it in your compost pile to make it even richer.
OK, what if you don’t have room for a compost pile (or you just don’t want one). Go to your local garden center and find a fertilizer which can be diluted before applying to the plants. One small box of Miracle Gro is pretty inexpensive (I like Miracle Gro for Roses) and lasts quite awhile.
Thoughts on Garden Equipment
If you have a small garden (100 square feet or less), try renting a tiller for a day or two instead of buying one. If, however, you have a larger garden, buying your own tiller may make sense for the long run.
A shovel, spade, hoe and pitchfork are really all the hand tools you need. The pitchfork is optional, and mainly used if you have a compost pile.
You can make your own tomato cages from concrete reinforcing wire; useful if you have a lot of tomatoes that need staking as they do seem to last forever. Rebar makes for good tomato stakes, if you have easy access to it. But if you have only a couple-three plants, you can use commercial tomato towers and cages and save yourself the trouble. I’ve found that most commercial cages/towers last quite a few years and tend to be easier to store.
Don’t have a lot of room for a garden? I’ve found the 5-gallon grow bags are great for medium-sized indeterminate tomato plants and are pretty inexpensive. You can go as small as 3-gallon for smaller and determinate tomatoes, and 10-gallon for the larger indeterminates.
Plants Versus Seeds
Hands down, it’s cheaper to plant seeds than buy tomato plants. Some of the best-producing tomato varieties may not be available as plants in your area. For $3, you can grow 20 to 40 plants from seeds…or you can buy one plant.
Keep in mind that if you store them in a cool, dry place, your tomato seeds will be good for several years. So if you don’t plant the whole pack this year, you automatically have seeds available for next (and the next…)!
Now it’s true that if you plant seeds you need to get some seed-starting soil; you don’t want to use anything from the garden, as it will have bacteria that may cause problems. But you’ll use very little per seed; a small 4-quart bag can be used for many, many dozens of seeds. Around here, the big-box garden centers (Home Depot, Lowe’s, etc.) carries the small bag for between $4 and $5.
You will also need a germination tray or two, but they are also inexpensive and last year after year. I had one windowsill mini-greenhouse that finally bit the dust…after 10 years.
Final Tomato Growing Tips
You really don’t need to spend a fortune to grow your tomatoes; household items will suffice in many situations, and other more permanent items (shovels, cages, etc.) will last many years if you treat them properly.
Not all tomato varieties produce the same number of fruits. Cherry tomatoes are far and away the most prolific! In general, the larger the tomato fruit size, the fewer the tomatoes produced. The heart-shaped tomatoes as a group tend to produce the least. For a continuous crop of larger (i.e. not cherry) tomatoes, go for the indeterminate plants whose fruits average around 6 to 10 ounces.
So go ahead; grow your tomatoes! And may your homegrown tomatoes be abundant and delicious-tasting.
Planting Tomato Seeds Today
Today was a day for tending to my tomatoes. Between planting tomato seeds, re-potting seedlings and transferring larger seedlings to the garden, it’s been busy. But a fun kind of busy, because the weather was gorgeous and it was nice being out in the fresh air and sunshine.
Tomato Varieties – Re-Potted
OK, first was transplanting some small tomato plants up. These were seeds I planted about 3 weeks ago, and they were growing very strongly. These were Supersweet 100, a hybrid indeterminate red cherry tomato. Since I had 3 Supersweet 100 plants, I am running an experiment. One I planted into its final container outside with the rest of the tomato plants. Another I planted up to the next container size and left outside in a location with bright indirect light. The final I planted to the next container size up, and I am keeping it inside, on a south-facing windowsill.
My next plant was a surprise. Some of my 10-year old seeds for White Bush sprouted and one of the seedlings was going for the sky! White Bush is, I believe, a determinate with ivory-colored skin and flesh; I didn’t save a whole lot of information on it so I am not sure (oops). It’s an open-pollinated tomato. So, I planted the strong one by itself the next container side up, and thinned the remaining to the two strongest and placed then together in the next container size up.
Then there was Yellow Cherry, another of the 10-year-old seeds. It’s an open-pollinated indeterminate yellow cherry tomato (pretty obvious from the name), but seems like it will be a smaller plant than Supersweet 100. I thinned the seedlings to the three strongest and planted them up to the next container size.
Planting Tomato Seeds – The Varieties
I also planted more tomato seeds today. Two were for heirlooms, and one for a hybrid I’ve been wanting to try.
The first heirloom seeds planted were Kellogg’s Breakfast, an indeterminate beefsteak tomato with orange skin and flesh. It’s a late season variety, so I don’t expect to be eating any of these tomatoes until sometime in May or June. But I sure am looking forward to them!
The next was the heirloom seeds for the tomato variety called Pineapple. These are the seeds I have planted for The Great Tomato Experiment, so it’s now officially underway! Pineapple is a personal favorite, with the flesh being sweet and delicious. Pineapple is a yellow tomato with red stripes on the skin and red marbling of the flesh.
My final tomato variety I planted seeds for today was Tomatoberry. It’s an indeterminate hybrid tomato whose fruit is roughly the shape and size of a large strawberry. A mid-season tomato variety, I expect to be nibbling on the first ripe fruits in late April. Tomatoberry is supposed to be be really sweet and juicy; I guess I will find out in a few months!
Plants I’m Still Waiting On
Brandywine is taking its time at the moment; lots of seeds germinated (to my surprise) from the 10-year-old seeds. The seedlings are still too tiny to re-pot though. The same goes for Big Rainbow. Both will likely be plenty big next week to re-pot to the next size container.
I had planted some Juliet seeds last week, and when I looked this morning, nary a sprout. I went about my morning chores, then all my garden work. When I came back in a few hours later, I was surprised to see 4 seedlings! Juliet is a grape-shaped cherry tomato, which I do so love to plant, seeing as they are practically foolproof to grow.
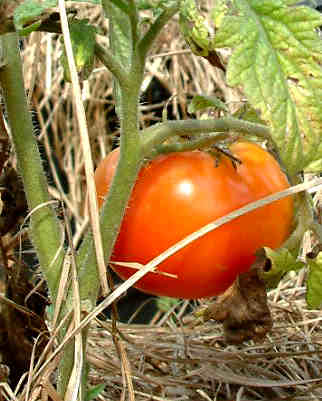
Before I leave for the day, here’s a photo of one of my first tomatoes in the garden, on the plant called Celebrity. The tomato is teeny-tiny at the moment, and hopefully it will be joined by others in the very near future.
That’s all for today; see you again tomorrow!
Tomatoes and Farmer’s Markets
You might be asking, “why grow my own tomatoes when I can buy them fresh at the farmer’s markets?”. And it is a good question. Here’s a little story about my latest venture to a farmer’s market.
I was looking for tomatoes (since I planted late don’t have anything ripe), cucumbers, strawberries — foods of that nature. Strawberries I found, and they were fantastic! Cukes were OK. But tomatoes…were plastic-smelling. They didn’t seem to be any different than what was sold in the grocery store!
So I got into a conversation with a few of the vendors, and they admitted that they buy tomatoes from a common grower, who also supplies the local grocery stores. Tomatoes are picked green, held in cold storage, then when needed — gassed to “ripen” quickly.
At least around here, vine-ripened tomatoes aren’t among the vegetables brought to the farmer’s markets very often. Why? Because vine-ripened tomatoes are softer and bruise (and squish) more easily when transporting them. In other words, they aren’t cost-effective to grow and sell on their own.
- NOTE: I know not all farmer’s markets sell only the “supermarket variety” tomatoes — some vendors actually do offer heirloom and hybrid tomatoes that were vine-ripened. Sadly, that wasn’t the case where I live.
Growing Your Own Vine-Ripened Tomatoes
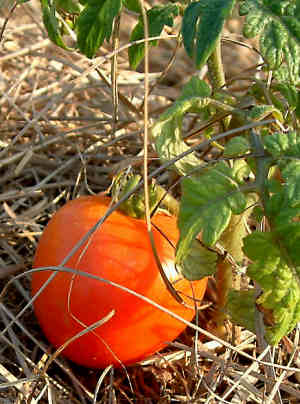 So it seems that unless you have a U-Pick-It type farm in the neighborhood, you won’t have access to honest-to-goodness vine-ripened tomatoes. Unless, of course, you grow your own.
And really, you don’t need a lot of room to grow a tomato plant; you can even do it in a 3-gallon container! So even if all you have is a small balcony, you have room for really fresh tomatoes.
I’ve even heard of people who have grown their tomato plants inside the home, in a sunny location. Of course those were the miniature cherry-sized varieties.
Even though I have a lot of room to grow my plants, I do like to grow some in containers. I’ll tell you a story sometime about how growing tomatoes in the ground in Summer and Winter have been disastrous for me. For now, suffice to say that it’s better for the plants if I can move them around if needed.
Buying Tomato Seeds for Growing
I like trying out different kinds of tomatoes (not to mention other veggies) and my favorite all-around seed vendors for tomatoes are strangely enough a tie between Amazon and Tomato Growers Supply. Amazon has a wider variety, but Tomato Growers Supply has more information about the varieties it does carry.
Which is best? That decision I will leave up to you!
